Falafel at Home, Naperville Style
There’s a special kind of joy in walking along the Naperville Riverwalk, catching the aroma of cumin and garlic drifting from a nearby kitchen, and thinking, “I could make that tonight.” You can—and you should. Homemade falafel becomes a weeknight ritual once you learn a few essentials. It’s cost-effective, deeply satisfying, and easy to tailor to your family’s taste. The best part is how forgiving the process can be when you understand the rhythm: soak, pulse, season, rest, and fry or bake. Skim a favorite local menu for inspiration, then bring the flavors into your own kitchen with ingredients you can find at Naperville’s markets and grocers.
Falafel connects beautifully with Naperville’s seasons. In summer, you’ll want wraps you can carry to a bench near the DuPage River. In winter, a plate with warm rice and extra tahini hits the spot while the windows fog a little from the cold outside. Whatever the season, falafel’s core is the same: humble chickpeas transformed by herbs, spices, and a little technique into something greater than the sum of its parts. Once you get the hang of it, you’ll start to make small adjustments—more cilantro here, a touch less garlic there—until you’ve built your own house style.
Ingredients and Why They Matter
The most important decision you’ll make happens before you even turn on the stove: dry chickpeas versus canned. Dry chickpeas soaked overnight are the way to go if you want true falafel texture—light, moist, and tender with a crisp shell. Canned chickpeas hold too much moisture and lead to a mushy interior that struggles to crisp properly. In Naperville, dry chickpeas are easy to find, and you’ll thank yourself for planning ahead. The soak rehydrates them without cooking, which is essential for the coarse crumble that defines the best falafel.
Next come the aromatics. Onion provides moisture and sweet-savory depth; garlic adds bass notes and a little bite. Parsley and cilantro are your green engine, brightening the chickpeas and threading their flavors through every bite. For spice, think cumin and coriander as your anchors. A touch of black pepper wakes things up. Salt is not optional—it’s the bridge that connects everything. For your binder, reach for chickpea flour or plain flour in small amounts. Some cooks like a pinch of baking powder for extra lift; others prefer to let the moisture balance do the work. Both approaches can be excellent when handled carefully.
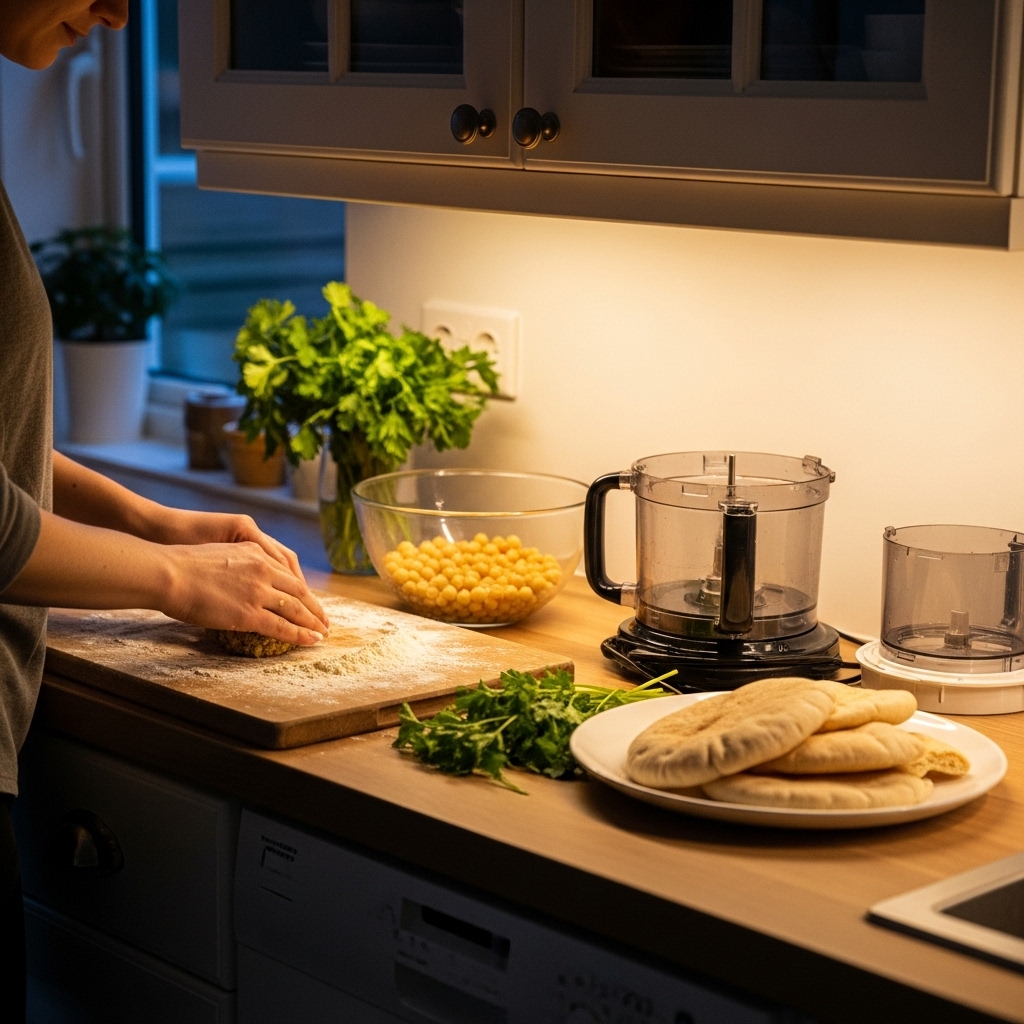
Equipment You Already Have
Good falafel doesn’t require fancy gear. A food processor is ideal for pulsing the soaked chickpeas into a coarse mixture. You want a texture that looks like damp sand with small chunky bits, not a smooth paste. A mixing bowl, spatula, and a plate or tray for resting the formed falafel are all standard. For cooking, choose between a deep skillet for shallow frying, a Dutch oven for more controlled deep frying, or an oven/air fryer if you prefer a lighter approach. A thermometer can help keep oil temperature steady—around the point where a small dab of mixture sizzles instantly and floats within a second or two. That cue is more reliable than any number when you’re just starting out.
In terms of serving, keep warm pitas or grain bowls ready. Fresh vegetables—tomatoes, cucumbers, romaine, and red onions—add texture. Tahini sauce ties everything together. If you plan to serve family-style, set out small bowls of toppings and let everyone build their ideal plate. This approach not only pleases picky eaters but also encourages friends to ask for seconds, which is the highest compliment a home cook can receive.
The Naperville Prep Plan
Start your soak the night before you plan to cook. Rinse dry chickpeas, cover with plenty of water (they’ll swell), and let them sit on the counter. In the morning, drain well and pat them dry with a clean towel. When evening rolls around, pulse the chickpeas with onion, garlic, parsley, cilantro, cumin, coriander, salt, and a small pinch of baking powder if you’re using it. Do this in quick bursts. Check the texture by pinching a bit between your fingers; it should hold together but feel grainy, not sticky. If it’s too wet, add a teaspoon or two of chickpea flour to set it right.
Transfer the mixture to a bowl and rest it in the fridge for 30 to 60 minutes. Resting firms the mixture and gives the spices time to bloom. While it rests, prep your toppings and warm your pita. This is a good time to tidy the counter so when you start cooking, your focus stays on the pan. Clear space for a plate lined with paper towels and get your oil heating if you plan to fry. You’re aiming for hot but not smoking oil, the kind that rewards patience with an even, golden crust.
Shaping and Frying with Confidence
Falafel shape is personal. Some Naperville home cooks prefer larger patties that tuck neatly into pita pockets; others like small rounds with plenty of surface area for crunch. Whatever your style, keep the thickness consistent so everything cooks at the same rate. If the mixture feels too loose to form, don’t panic; add a smidge more chickpea flour and chill for five minutes. That tiny tweak can change everything.
Slide your formed falafel into the hot oil without crowding the pan. Listen for a steady, friendly sizzle. Turning too early can cause breakage, so wait until a crust forms before nudging. When the exterior is a deep golden brown, transfer to your lined plate. The first batch is your test; break open one piece to check the interior. It should be moist and vibrant with herbs. Adjust heat if necessary, then continue. By the second or third batch, you’ll hardly need to think—you’ll feel when it’s time to flip and when to pull.
Oven and Air Fryer Options
If you’d rather avoid frying, the oven and air fryer both deliver admirable results with a few considerations. Brush or spray a little oil on your formed falafel to encourage browning. In the oven, preheat thoroughly and use a hot, heavy sheet pan. Flip halfway through for even color. With an air fryer, work in small batches and don’t crowd. The result will be slightly different from traditional frying—less decadent crunch, perhaps—but still very satisfying, especially when paired with a lively tahini sauce and crisp vegetables.
Speaking of sauce, whisk tahini with lemon juice, water, salt, and a hint of garlic until it turns silky and pale. Add water a spoonful at a time until the consistency drips slowly from a spoon. If the sauce seizes when the lemon hits, keep whisking; it will smooth out as you add water. Sauce is the part people remember, so taste and tweak until it’s balanced. Naperville eaters tend to like a lemon-forward profile that brightens the chickpeas without overwhelming them.
Serving Ideas for Riverwalk Picnics and Cozy Nights
For a picnic vibe, bundle warm falafel in paper and head to the Riverwalk just before sunset. Tuck pickles, tomatoes, and cucumbers into the pita at the last minute so they stay crisp. At home on colder nights, turn falafel into a plate with warm rice, grilled vegetables, and extra tahini. Add a squeeze of lemon, and you’ll feel the day’s edges soften a little. Leftovers store well in the fridge; re-crisp in a hot oven for a few minutes to return the exterior to its former glory.
Falafel also plays well with others. Offer a small dish of hummus or baba ghanoush for dipping. If you’re feeding a mixed group, grilled items can share the plate without overshadowing the star. The contrast of textures will make your falafel taste even more alive. And if kids are involved, let them assemble their own wraps—it turns dinner into a little craft project with delicious results.
Troubleshooting Like a Pro
If your falafel falls apart in the oil, start by checking moisture. Too wet a mixture is usually the culprit; add a spoon of chickpea flour and chill briefly. If the interior feels dense and heavy, your chickpeas may have been over-processed; next time, pulse in shorter bursts and avoid creating a paste. Greasy results point to oil that wasn’t hot enough or overcrowding the pan, both of which prevent proper crust formation. Keep your batches modest and your heat steady, and the falafel will reward you.
Flavor imbalances are easy to fix. If your falafel tastes dull, it’s probably under-salted or lacking lemon in the sauce. If it’s too sharp, dial back the raw garlic in your mixture and let the herbs carry more of the load. Parsley and cilantro can vary in intensity depending on the season; taste a leaf before you commit to a big handful, and adjust accordingly.
Mid-Recipe Inspiration
When you’re in the middle of cooking and need a nudge of creativity, look to a well-composed menu for pairing ideas. Maybe tonight your falafel wants a side of fattoush with sumac onions, or maybe it wants the smoky depth of baba ghanoush. Borrow combinations you love from local spots and make them your own at home.
Over time, you’ll notice how small changes lead to big improvements: a longer rest makes the mixture easier to shape, a touch more coriander adds lift, and a hotter pan leads to a thinner, crisper crust. Keep notes in a notebook or on your phone—soak times, spice ratios, preferred herb amounts. That log becomes your personal Naperville falafel playbook.
Hosting a Falafel Night
Falafel night is an instant crowd-pleaser. Set out bowls of chopped tomatoes, cucumbers, romaine, pickles, and lemon wedges. Keep the falafel coming in small batches so each round lands at the table hot and fresh. If your friends are the helpful type, delegate: one person shapes, another fries, and someone else whisks the tahini. Let music spill into the kitchen and make the cooking part of the party. By the end of the night, you’ll have a stack of compliments and, if you’re lucky, a few leftovers that reheat beautifully.
For a quieter evening, build plates with intention. Place a generous smear of hummus under your falafel so the warm chickpeas melt slightly into the tahini-rich spread. Add a salad that brings crunch and acid. Finish with a drizzle of lemony sauce and a sprinkle of chopped herbs. The plate will look like something you’d happily order out, and the first bite will taste like you’ve mastered something important.
Frequently Asked Questions
Why should I use dried chickpeas instead of canned?
Dried chickpeas soaked overnight give falafel its signature texture—light, tender, and crisp at the edges. Canned chickpeas are already cooked and too wet, often leading to a dense, mushy interior.
How do I prevent falafel from falling apart while frying?
Control moisture. Drain soaked chickpeas well, pulse to a coarse texture, add a little chickpea flour if needed, and rest the mixture before shaping. Fry in hot oil without crowding the pan.
Can I bake or air fry falafel?
Yes. Brush or spray with oil, preheat thoroughly, and flip halfway for even browning. The texture differs slightly from frying but remains satisfying, especially with a bright tahini sauce.
What herbs and spices are essential?
Parsley, cilantro, cumin, and coriander form the core. Salt ties everything together. Adjust garlic and pepper to taste, and consider a pinch of baking powder for extra lift if desired.
How should I serve falafel for a family with different tastes?
Offer a build-your-own setup with warm pita or greens, a variety of vegetables, and sauces. That way everyone assembles their ideal bite without extra work for the cook.
Cook Tonight, Naperville
There’s no better time to bring falafel home. Skim a trusted neighborhood menu for flavor ideas, soak your chickpeas, and let the scent of cumin, coriander, and parsley fill your kitchen. Whether you fry, bake, or air fry, your first hot, crisp batch will make you wonder why you ever waited in line.