Starting your falafel journey in Naperville, Illinois is easier than you might think when you focus on the right habits from the beginning. With a few practical tips, you can serve a platter that is crisp, aromatic, and consistently delicious. To imagine how your homemade falafel can anchor a complete Mediterranean meal, glance at a well-rounded menu and picture the sauces, salads, and breads that would complement your very first batch.
Falafel success hinges on texture, temperature, and patience. The goal is a granular mix that clumps when pressed, a hot cooking surface (oil, oven, or air fryer), and a rest period that helps the mixture bind. The following tips address common beginner pitfalls and provide localized advice for Naperville kitchens.
Tip 1: Choose dried chickpeas and soak properly
Dried chickpeas soaked for 12 to 18 hours expand but remain uncooked, which is crucial. After soaking, drain well and pat dry. Excess moisture makes falafel fragile and leads to spattering during frying. If your herbs or onions are wet, dry them before processing to keep the mixture light and cohesive.
Tip 2: Pulse, do not puree
A food processor is ideal, but technique matters more than equipment. Pulse in short bursts until the mixture looks like fine breadcrumbs. You should see tiny flecks of herbs and chickpea pieces, not a paste. Overprocessing traps moisture and leads to dense falafel. Scrape the bowl as needed to keep the grind even.
Tip 3: Season boldly but taste test
Salt, cumin, and coriander are the backbone. Add a pinch of black pepper and optional chili if you enjoy heat. Always test-fry one piece. Tasting a hot sample is the fastest way to calibrate salt and spice before committing the whole batch.
Tip 4: Rest the mixture
Chill the mix 30 to 60 minutes. Resting hydrates any binder and firms the texture so it shapes cleanly. If your schedule is busy—common in Naperville—make the mix earlier in the day and cook later. A rested mixture cooks more evenly and resists cracking.
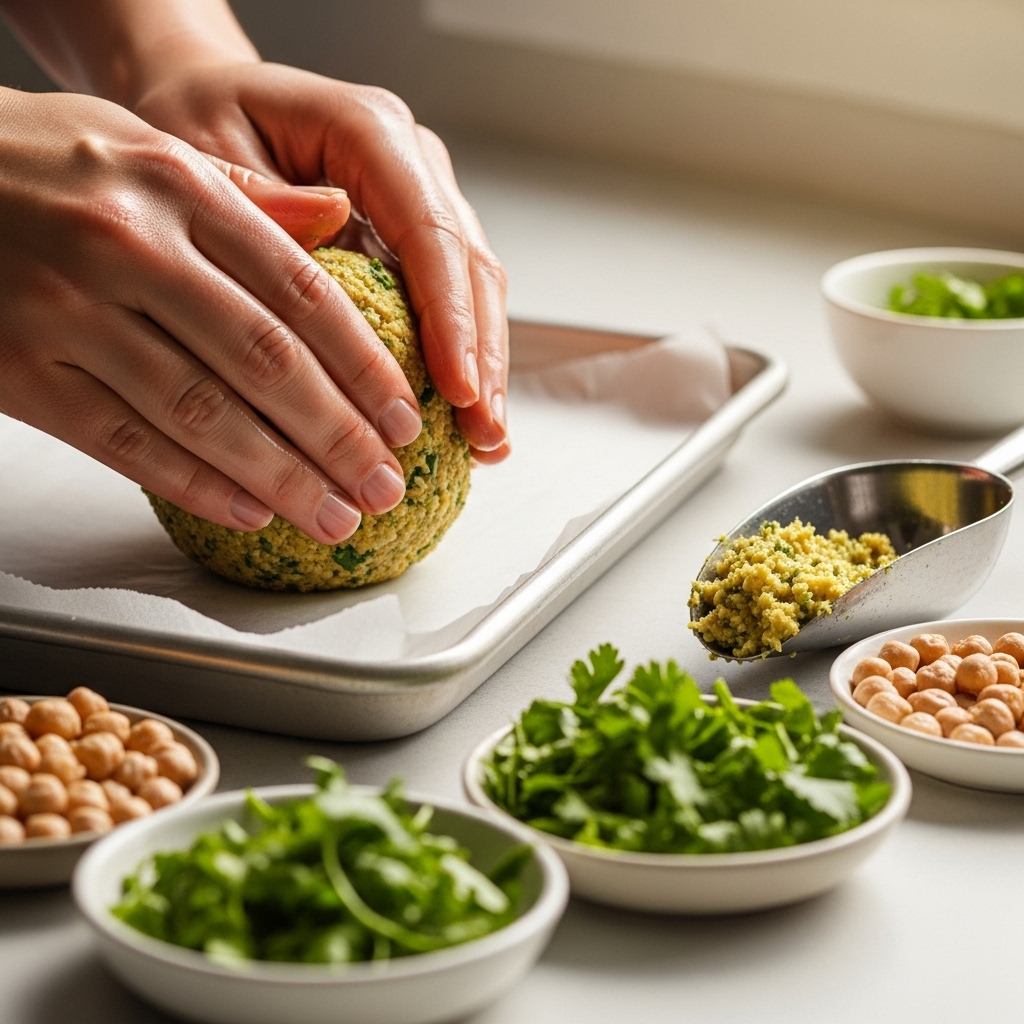
Tip 5: Shape gently and consistently
Use a small scoop or two spoons to portion evenly. Lightly wet hands to prevent sticking. Press just enough to hold together; don’t compact the mixture. Uniform size ensures even cooking and makes timing predictable for beginners.
Tip 6: Frying temperature is everything
Heat oil to 350 to 365°F and monitor with a thermometer. Add falafel in small batches so the temperature stays stable. If the oil cools, the pieces absorb oil; if it’s too hot, they brown before cooking through. Adjust heat between batches and allow recovery time.
Tip 7: Oven and air fryer strategies
For a lighter method, bake at 425°F on a lightly oiled sheet and flip once. Air fry at 375°F with a light oil mist, shaking halfway. A hot surface plus thin oil film encourages browning. While these methods produce a slightly different crust than deep-frying, they are beginner-friendly and low-mess.
Tip 8: Build a simple sauce and fresh sides
Tahini, lemon, garlic, water, and salt whisk into a creamy sauce in minutes. Pair with chopped cucumbers, tomatoes, and herbs. A quick-pickled red onion adds brightness. Think about the overall plate, not just the falafel; a balanced spread makes even a first batch feel special. For pairing ideas, consider how a neighborhood restaurant constructs plates on its menu, then recreate the parts you like most.
Tip 9: Troubleshoot texture fast
Crumbly falafel? Pulse a little finer, dry ingredients well, and rest longer. Dense falafel? Pulse less and fluff the mix with a fork before shaping. Flat flavor? Increase salt slightly and bloom spices by pulsing briefly after adding them. Greasy pieces? Raise the oil temperature and avoid crowding.
Tip 10: Make-ahead and freezing for convenience
Shape and freeze raw falafel on a tray, then store in a container. Cook from frozen at a slightly lower heat for a bit longer. This method lets you make a big batch on a relaxed afternoon and cook fresh portions on a weeknight after a stroll by the Riverwalk or a busy day of errands.
Tip 11: Plan your station
Set up a simple station: a tray for shaped pieces, a pot with thermometer, a rack for draining, and bowls of sauces and veggies. A tidy station keeps you calm and ensures the first batch is as good as the last.
Tip 12: Respect the test batch
Fry one or two pieces first to check seasoning and structure. This quick test reveals if the mixture needs more salt, a touch of flour, or a finer grind. Beginners who test early rarely end up with a disappointing batch.
Serving in Naperville style
Serve fresh falafel on warm bread or in bowls with plenty of vegetables. Add lemon wedges and herbs. For a family dinner, arrange components buffet-style and let everyone build their own. It turns a simple meal into a relaxed gathering.
FAQ
Q: Can I use canned chickpeas in a pinch? A: They tend to make a paste that’s difficult for beginners to manage. Use dried and soaked for best results.
Q: Do I need a special scoop? A: No. Two spoons or lightly wet hands are fine. A small disher helps with uniformity but is optional.
Q: What if my falafel cracks? A: The mix may be too dry or underprocessed. Pulse a bit more, add a teaspoon of water if it feels very dry, then rest again.
Q: How long does tahini sauce keep? A: About four to five days refrigerated. Stir and thin with a splash of water as needed.
Q: Can I make it kid-friendly? A: Keep chili low, serve hot sauce on the side, and offer familiar sides like cucumbers and carrots to encourage first tastes.
Bring these tips to life in your kitchen
Gather your ingredients, plan a relaxed hour, and enjoy shaping the first batch. When you want inspiration for complementary sides that make the meal sing, let a thoughtfully arranged menu guide you toward sauces and salads that enhance your crisp, golden falafel. With practice, your Naperville kitchen will turn out falafel that’s both weeknight-friendly and weekend-worthy.