Authenticity at Home: Baking Pita with a Naperville Accent
Ask ten bakers what makes pita authentic and you’ll hear a dozen answers: the right flour, the fierce heat, a gentle hand with the rolling pin, or a hearth that leaves a kiss of char. In Naperville kitchens—from sunlit condos near Downtown to brick homes that look out toward the Riverwalk—authenticity is built on respect for tradition and attention to our own local conditions. The goal is a round that puffs dramatically, tears tenderly, and carries fillings with quiet confidence. If you like imagining the final meal as you bake, a glance at a Mediterranean menu can anchor your flavor compass—think spiced meats, cool salads, and sauces that invite a second bite.
Authentic pita is neither complicated nor fussy, but it demands intention. Flour matters. Hydration matters. Heat matters most of all. Each step nudges texture and flavor toward the breads you’ve torn into at bustling cafés. Over time, I’ve refined a method that honors classic techniques while accounting for the quirks of Naperville weather and equipment. What follows is a narrative recipe—rich in why as well as how—designed to deliver consistent pockets and the depth of flavor that lingers after the plates are cleared.
Flour Fundamentals and Water Wisdom
Traditional pitas thrive on medium- to high-protein wheat flour. In practical terms, that means a dependable unbleached all-purpose flour works well, while a bread flour in the 11.5–12.5 percent protein range provides extra structure and chew. Many bakers mix the two. If you crave the nutty depth of whole wheat, start with a third of the total flour and adjust water upward to maintain suppleness. Authenticity isn’t a single formula; it’s the taste and feel that signals balance.
Water shapes everything—from gluten to fermentation speed. Around Naperville, our tap water is reliable and, when filtered, clean-tasting. If your dough feels sluggish in winter or quick-tempered in summer, look first to water temperature. Aim for warm, not hot. The dough should gather willingly without turning sticky like paste. Within minutes, it should feel alive under your hands, a quality I notice most starkly on quiet mornings when the kitchen is cool and the only sound is the rhythmic push and fold of kneading.
Mixing with Purpose
Combine flour, instant yeast, and salt in a bowl, then add warm water, a small drizzle of olive oil, and a teaspoon of honey or sugar. Mix to a shaggy mass and pause for ten minutes to hydrate the flour. Resume kneading—by hand for eight to ten minutes or by mixer for five to seven—until the surface is smooth and elastic. Authenticity lives in the texture: a dough that clings lightly to your fingers but releases with a clean touch, an internal web strong enough to trap steam but gentle enough to fold around fillings.
When the dough feels right, shape it into a ball, oil lightly, and set it in a covered bowl. Guard against drafts—older windows near the historic district can carry a sneaky chill—and let the dough rise until nearly doubled. Timing varies with the season: an hour on a warm July day, closer to two in January. Trust the poke test; a slow, partial spring-back means you’re ready for the next step.
Fermentation for Flavor
Authentic pita benefits from flavor built during fermentation. If your day allows, tuck the dough into the fridge for a slow, cold rise after the initial room-temperature puff. Even a few hours deepen aroma and complexity. Before shaping, let the dough warm to room temperature; a chilled dough resists rolling thinly enough to encourage a pocket. If you’re baking after work or between weekend errands on 75th Street, a straight rise at room temperature yields excellent bread—don’t let schedule become a barrier.
Dividing, Rounding, and the Bench Rest
Turn the dough onto a lightly floured counter. Divide into equal pieces—about the size of small oranges—and round each into a taut ball by tucking edges under and rotating against the counter with cupped hands. This surface tension guides the rise and promotes even puff. Cover and rest for twenty to thirty minutes. This bench rest is not idle time; it’s when gluten relaxes and moisture distributes, laying the groundwork for trouble-free rolling.
Rolling: The Signature of Authentic Pita
Roll each ball from the center outward, rotating frequently, until you reach roughly a quarter-inch thickness. Keep the center slightly thinner than the edges. Avoid pressing with fingertips or docking with a fork; the top and bottom surfaces must remain separate to trap steam. Tiny blisters on the surface are friends, not flaws. If the dough springs back, let it rest briefly and try again. Uniform circles are lovely but not required; authenticity welcomes a little asymmetry, like the curve of the DuPage River after a spring rain.
Heat, Stone, and Flame
Authentic puff demands heat. Preheat a baking stone or steel at 500°F for at least forty-five minutes. Think of it as charging your culinary battery. Slide a rolled round onto the blazing surface and watch for bubbles within a minute, then a ballooning that lifts like a dome. As soon as it inflates and takes on a hint of color, remove it to a rack and cover with a towel to trap steam. Each second on the stone builds color quickly; authenticity favors tenderness with flirtations of char, not a brittle crust.
If you have a gas stove, finish with a few seconds over an open flame using tongs to add the merest char-kiss you’ve admired in traditional breads. If you prefer stovetop baking from start to finish, a cast-iron skillet heated until a drop of water skitters will deliver robust puff. Flip once, press gently with a spatula, and watch the pocket bloom.
Local Sourcing and Seasonal Pairings
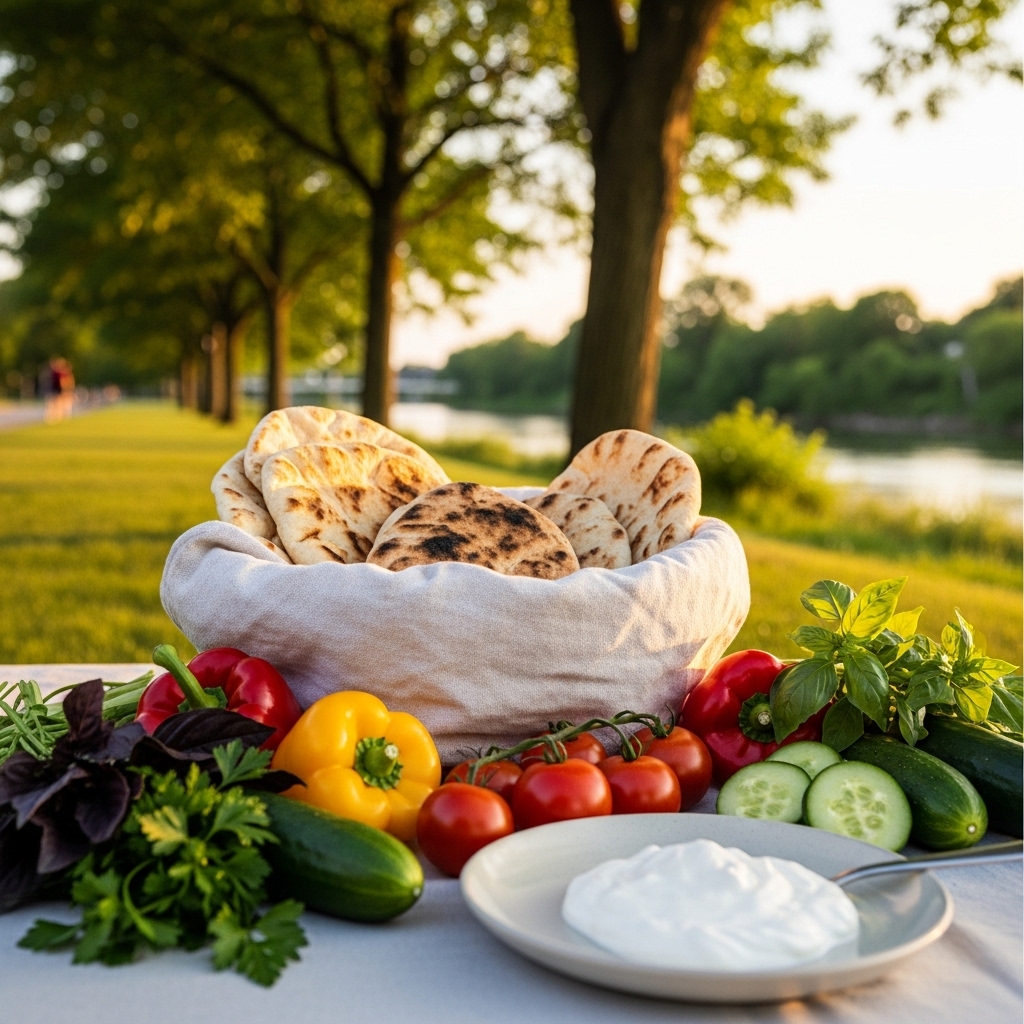
Authentic flavor thrives on fresh ingredients. Naperville Farmers Market vendors offer herbs, greens, tomatoes, and peppers that love to be tucked into warm pitas. Seek freshly milled whole wheat when available; freshness elevates aroma in ways that are hard to believe until you taste it. In neighborhood groceries, look for unbleached flours with clear protein listings, and keep olive oil fragrant and well-stored. When you bring your haul home, protect it from summer humidity in airtight containers; our June thunderstorms have a way of sneaking into pantries if given the chance.
For pairings, think balance. Crisp cucumbers and tomatoes offset the warmth of spiced meats. A drizzle of tahini, a spoon of garlicky yogurt, or a splash of lemon brightens the plate and cuts richness. If you need inspiration mid-bake, there’s no shame in letting a shawarma-forward shawarma menu spark your imagination for color, texture, and contrast.
Troubleshooting with a Baker’s Eye
When puff is shy, look to thickness, heat, and moisture. Too thick, and steam can’t separate the layers; too thin, and the layers fuse. If your oven hesitates to hold high heat—common in older electrics—extend the preheat and bake one round at a time. Dough that feels dry at mixing leads to reluctant puff; increase hydration slightly, especially in winter when indoor air is arid. If pitas balloon unevenly, practice rolling with gentle, even pressure and rotate frequently to distribute thickness.
Texture troubles have predictable reasons. Dense crumb suggests under-fermentation or over-kneading; slack dough that collapses points to over-proofing. Pale pitas often signal insufficient heat or short bake times; a whisper more time on the stone or a swift finishing pass over a flame solves it. Store baked rounds under a towel to collect steam and preserve pliancy—authentic pita should fold without cracking.
Serving, Storing, and Reheating
Authentic pita is best warm, when the crumb is relaxed and fragrant. If you’re serving a crowd, stack rounds in a towel-lined basket to keep them supple while you set out fillings. Leftovers keep a day or two at room temperature; for longer, freeze in stacks with parchment between each. Reheat in a low oven wrapped in foil or pass quickly over a hot skillet. Gentle warmth revives the pocket’s flexibility without drying the edges.
Weaving Pita into a Naperville Day
Mix dough in the morning and let it rise while you walk the Riverwalk or run a quick errand near Ogden Avenue. Divide and bench rest after lunch, then roll and bake close to dinner so the bread lands on the table warm. If plans change—kids’ activities, downtown traffic, or one more email—slide the risen dough into the fridge and pick up where you left off later. The bread will reward your patience with deeper flavor and a calmer bake.
Tradition, Technique, and Confidence
Authenticity thrives on repetition. Each batch teaches something: the feel of a well-hydrated dough, the sound of a stone that’s truly preheated, the sight of tiny blisters that precede a full puff. Over time, you’ll predict the moment of lift and reach for the towel with an easy confidence. That comfort in your own kitchen—that sense that the bread belongs here, with these people, in this town—is the most authentic element of all.
Frequently Asked Questions
What flour blend yields the most authentic texture?
A mix of unbleached all-purpose and bread flour offers strength and tenderness. If you enjoy whole wheat’s character, keep it to a third at first and raise hydration to maintain a supple dough that still puffs.
Do I need sugar or oil for authenticity?
Traditional formulas vary. A teaspoon of honey or sugar encourages browning and yeast activity, and a little olive oil adds tenderness. Both are optional but helpful. Authenticity comes from method and heat as much as from precise ingredient lists.
Why did my pitas brown without puffing?
Likely causes include insufficient preheat, dough rolled either too thin or unevenly, or an exterior that dried before steam could expand the layers. Increase hydration slightly, protect dough from air as you work, and confirm your stone or skillet is fully heated.
Can I bake pita entirely on the stovetop?
Yes. A cast-iron skillet over strong heat produces excellent results. Cook until bubbles form, flip, and press gently to encourage a full pocket. Finish over a gas flame for a touch of char if you like.
How do I keep pitas soft for serving?
Cover them with a clean towel as they come off the heat. The trapped steam relaxes the crumb and keeps the pocket flexible. Rewarm gently before serving if needed; harsh heat dries the surface and robs tenderness.
What fillings complement authentic pita best?
Balance is key: juicy, well-seasoned proteins with crisp vegetables and a creamy or tangy element. The bread should star as much as the fillings. Think textures that play together rather than compete.
When you’re ready to take your fresh, authentic pitas from the cooling rack to the table, gather your favorite fillings, invite a few friends, and build a meal that suits your evening. For flavor direction and pairing ideas, a quick look at a Mediterranean menu can help you craft a spread that tastes as right in Naperville as it would in a bustling street market abroad.