
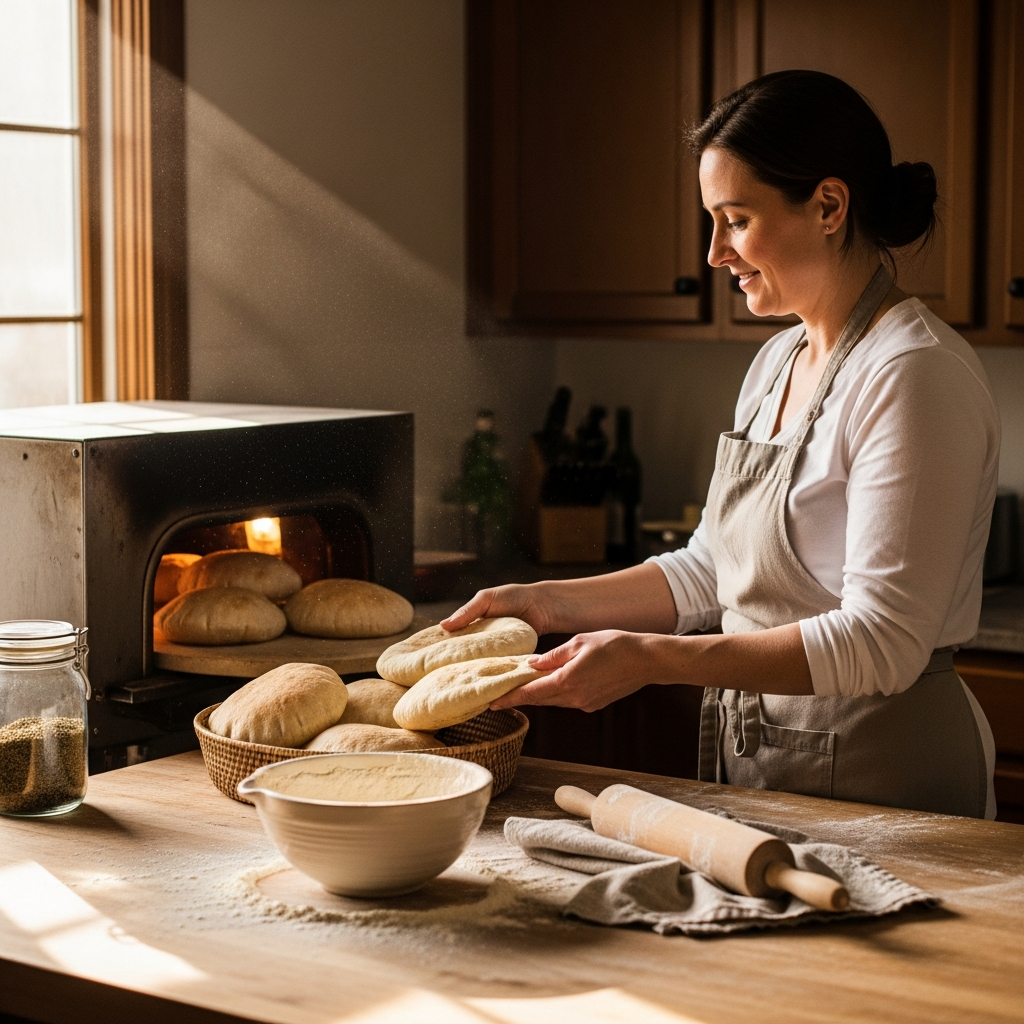
On a crisp Naperville afternoon, when the breeze off the Riverwalk carries that familiar mix of fresh water and suburban calm, there is nothing quite like pulling a tray of warm, puffed pita breads straight from a home oven. This is the sort of project that turns a regular midweek dinner into a neighborhood-worthy moment, the kind that has kids rushing to the kitchen and friends asking for your method. As a local who has baked through our muggy summers and bracing winters, I can tell you that oven-baked pita is as practical as it is delightful, and it fits our Naperville rhythm perfectly. Before we dive into the dough, a quick nod to how we love to eat around here: pita is just as comfortable wrapped around backyard-grilled chicken as it is served next to a hearty salad after a stroll downtown, and it pairs beautifully with the bold flavors you might recognize from a great shawarma menu.
You do not need fancy equipment to succeed, and you certainly do not need a professional bakery setup. What you need is a little kitchen confidence, an understanding of our local climate, and a reliable, hot oven. Naperville kitchens tend to be well-insulated, which helps with proofing dough, yet our seasonal shifts mean your approach should be nimble. On humid summer days, dough absorbs less water; on dry, cold days, it may drink a little more. Once you accept that small adjustments are part of the fun, a consistent, puffed pita becomes your new normal. You will soon see how a hot baking surface, a properly rested dough, and an attentive eye toward thickness produce that magical pocket.
Why oven-baked pita works in Naperville kitchens
Pita is a bread that rewards heat and timing, two factors our home ovens can deliver just fine. A preheated stone or sturdy baking sheet transforms into a hot deck, and that initial thermal blast turns interior moisture into steam, inflating the dough into a balloon. In Naperville, where family schedules can be hectic—between soccer at Frontier Sports Complex, errands along Route 59, and an evening at Naper Settlement—reliable, repeatable techniques matter. The oven method is forgiving, scalable, and friendly to meal prep. You can bake several pitas at once without monopolizing a stovetop, and you can adjust the bake by a minute or two to suit your preferred color and chew.
Choosing ingredients and sourcing them locally
All-purpose flour from our neighborhood grocers—whether you shop at Jewel-Osco on Ogden or stop by for a bulk bag at Costco—works beautifully. Bread flour brings extra strength and can help with dramatic puff, but it is not essential. Yeast is straightforward: instant yeast is convenient and quick, while active dry yeast performs perfectly well if you bloom it in warm water until foamy. Naperville’s tap water is consistent and just fine for dough; if you prefer filtered, go right ahead. A touch of olive oil softens the crumb, a little sugar or honey encourages browning, and salt brings balance. The beauty here is that every ingredient is easy to find, and once you dial in your ratios, your dough becomes second nature, like a favorite walking route along the DuPage River.
Mixing and kneading for dependable structure
Start by whisking your dry ingredients, then add warm water and a drizzle of olive oil, stirring until a shaggy mass forms. Let it rest—an autolyse of ten to twenty minutes lets flour hydrate fully—before a gentle knead. You are not aiming for a tight, dense dough; you want suppleness and a soft bounce under your fingertips. In Naperville’s winter, try proofing the bowl near the oven’s warmth or inside with the light on; in summer, there is no need to coddle the dough, as ambient warmth speeds fermentation along quickly. After the first rise, a smooth, pillowy dough tells you you’re on the right track. Resist the temptation to add too much flour while kneading. Slight tackiness is fine, and it pays off later with better steam generation for that coveted pocket.
Dividing and shaping with intention
Divide the dough evenly, shaping each piece into a taut ball by tucking edges underneath and rotating it in your palms. Resting these balls under a light cover allows gluten to relax, which makes rolling easier. The thickness matters more than you might think: roll to about the thickness of two stacked credit cards, keeping the surface even and the edges smooth. An overly thin center with thick edges can cause lopsided puffing; a uniformly even round inflates beautifully. Use just enough flour on the counter to prevent sticking, but avoid a dust storm—excess flour can burn on your baking surface and dull the final color.
Preheating and baking like a pro
Turn your oven as high as it will go—many Naperville ovens reach 500 to 550 degrees—and preheat a baking stone, steel, or an inverted heavy sheet pan for at least 30 minutes. That’s the nonnegotiable secret. Slide the rounds onto the hot surface and close the door promptly to trap heat. Within a minute or two, you should see a modest dome forming, which then expands dramatically. If your oven has a window, watch the transformation with the same anticipation you get at Ribfest fireworks; resist opening the door too soon, as heat loss can flatten tender puff. Bake until lightly golden with just a few toasted freckles. If you prefer a slightly softer pita, pull them when just set and keep them covered with a clean towel right away.
Life around the table: how Naperville eats pita
Our city embraces hearty, family-friendly meals, and fresh pita slips into that culture effortlessly. Picture a Saturday evening when friends swing by after a Riverwalk stroll; you set out a platter of warm pitas, a bowl of garlicky yogurt sauce, and a colorful spread of roasted vegetables. The bread acts as utensil and canvas at once. Flavor-wise, you can let local inspiration drive choices: late-summer tomatoes from the farmers market, cold-weather slow-cooked lamb, or even a Midwest twist like shaved roast beef with arugula. It is also fun to connect your baking with bold flavors you might crave when dining out. If you are in a planning mood, imagining fillings alongside an enticing shawarma menu can spark new combinations for your homemade rounds.
Troubleshooting the puff
Flat pitas happen to everyone, even experienced bakers. Usually, the culprits are a cool oven, thick dough, or a baking surface that did not preheat long enough. A slightly higher hydration helps generate steam; if the dough feels stiff, drizzle in a bit more water next time. Roll evenly, and avoid over-flouring during shaping. If one side stubbornly refuses to puff, try flipping the round onto the stone so the seam side faces down—this small move can influence how steam escapes. Given our near-sea-level elevation, you do not need altitude adjustments in Naperville; steadiness and heat carry the day.
Make-ahead plans for busy weeks
When schedules fill up—school concerts, commuter trains, and weekend tournaments—pita dough can flex to your calendar. After the first rise, portion and refrigerate dough balls in a lightly oiled container. They will hold for a day or two, ready to roll and bake on demand. Baked pitas freeze well, too; slip parchment between them and store in a freezer bag. Reheat quickly in a hot oven wrapped in foil or directly on a warm skillet to restore that just-baked suppleness. This approach keeps weekday dinners lively without adding stress, and it invites spontaneous gatherings where warm bread becomes the centerpiece.
Flavor twists and finishing touches
Naperville cooks love to customize, and pita is perfect for subtle riffs. Brush the edges with olive oil and scatter sesame seeds, or mix za’atar into the dough for a savory, herbal lift. A pinch of garlic powder or a grating of lemon zest in the dough offers a hint of brightness that complements grilled meats and roasted vegetables alike. For a kid-friendly angle, lightly butter the warm pita and dust with a pinch of cinnamon for a not-too-sweet snack—proof that one dough can wear many hats in a single household.
What to serve alongside
In warm months, chilled salads—tabbouleh with heaps of parsley, chopped cucumber-tomato mixes with lemon and olive oil—make the pita sing. In winter, soups become their best friend: think tomato, lentil, or a hearty chicken stew. The bread becomes a scoop, a dunker, and a wrap all in one. Pita also turns leftovers into something fresh. Roast vegetables from a Sunday tray bake slide into a pocket with tahini and crumbled feta for Monday’s lunch. Grilled chicken from a backyard cookout transforms into a quick wrap for a busy Tuesday before a performance at the Wentz Concert Hall.
Dialing in texture: soft, chewy, or crisp
Small tweaks can shift pita’s personality. Pull them slightly underbaked for super-soft rounds that fold like a dream, or let them develop more color for a pronounced chew and a toasty aroma. If you crave crisp chips for a party dip, slice baked pitas into wedges and toast them briefly in a moderate oven. The same base dough serves all three styles, which means one weekend bake can support snacking, lunches, and dinners throughout the week.
Frequently asked questions
How do I get the best puff without a baking stone?
Use an inverted heavy baking sheet that has been preheated for at least 30 minutes at your oven’s maximum temperature. The thicker the metal, the better the heat retention. Work quickly when loading dough so the oven does not shed heat, and roll your rounds evenly so steam inflates the center rather than leaking through thin spots.
Can I use whole wheat flour in this recipe?
Absolutely. Substitute up to half the flour with finely milled whole wheat to keep the crumb soft while adding nutty depth. If you go 100 percent whole wheat, add a splash more water and extend the rest between kneading and rolling to let bran hydrate fully, which helps puff.
What if my pitas taste yeasty?
That usually signals overproofing or too much yeast for the room temperature. In warm summer kitchens, shorten the first rise or reduce yeast slightly. Aim for dough that has risen by about 60 to 75 percent rather than doubling dramatically; strength matters more than sheer volume.
How do I store baked pitas so they stay soft?
As soon as they come out of the oven, stack them and wrap them in a clean towel to trap residual steam. Once cool, slip them into an airtight bag. For day-two freshness, rewarm briefly in a hot oven or on a dry skillet; the heat revives suppleness in seconds.
Why did only some of my pitas puff?
That is common and not a failure. The ones that did not puff are still wonderful for scooping and dipping. Inconsistent puff often points to uneven thickness or a momentary dip in oven temperature. Next time, extend the preheat and roll with a lighter hand to keep the surface uniform.
What fillings pair well with oven-baked pita?
Grilled chicken with lemon and garlic, slow-roasted vegetables, crisp greens, and bright sauces like yogurt-tahini all shine. For inspiration that celebrates bold spices and layered flavors, look to what excites you on a classic shawarma menu, then translate those ideas to your own pantry.
Can I bake pita on parchment?
Yes, especially if you are loading multiple rounds at once. Cut the parchment to fit your stone or sheet, and slide it directly on top. The paper slightly insulates the base, which can soften the underside a touch; if you prefer a darker bottom, remove the parchment for the last minute of baking.
Is it okay to freeze the dough?
It works well. After dividing into balls, oil lightly, freeze on a tray, then move to a bag. Thaw overnight in the fridge and bring to room temperature before rolling and baking. The convenience is tremendous for weeknights in Naperville when time gets away from you.
Ready to make your kitchen smell like a warm bakery and set out pitas that your friends will talk about long after the plates are cleared? Preheat that oven, gather your simple ingredients, and give this method a try. When you are craving bold, convivial flavors to match your fresh bread, let your next dinner party take cues from a vibrant shawarma menu. Your table will thank you, and your Naperville kitchen might just become everyone’s favorite stop.