Authentic Pita Bread Starts at Home in Naperville
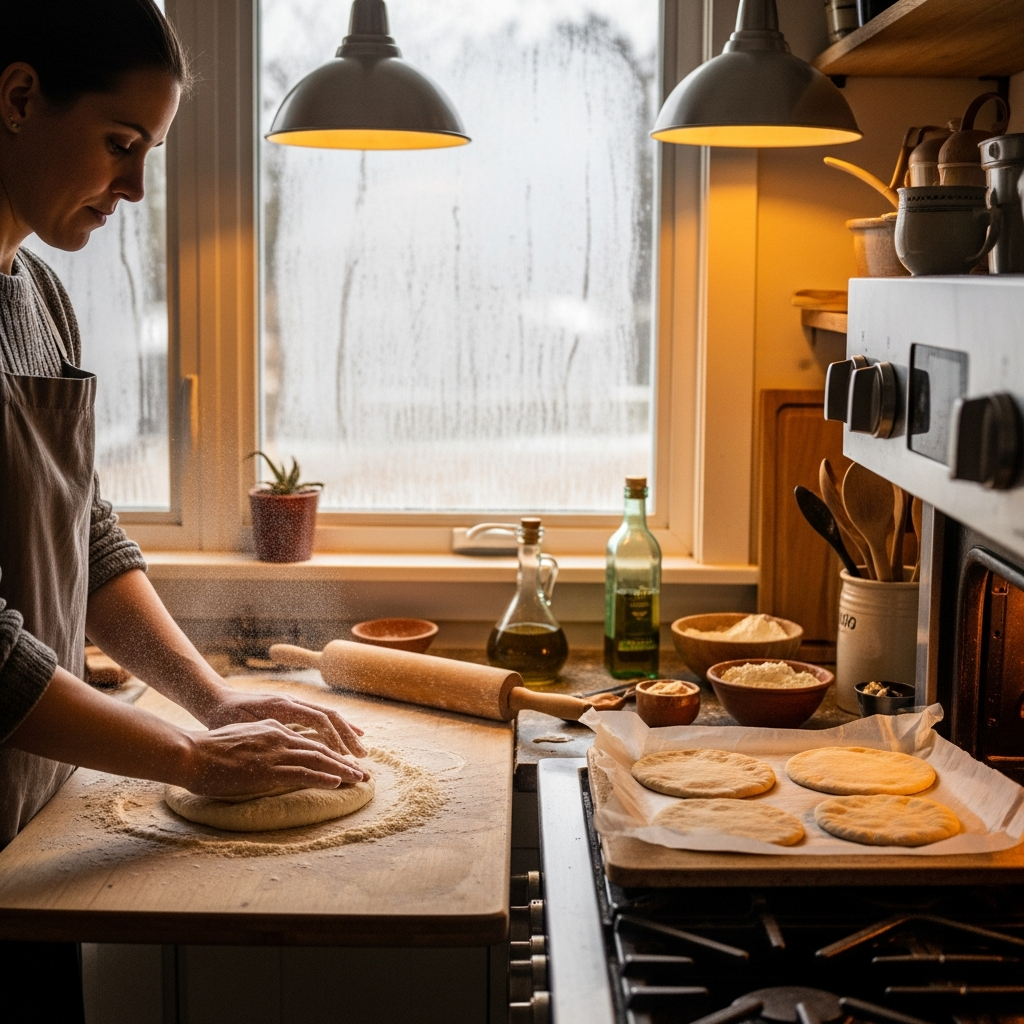
On a chilly evening when the wind comes off the DuPage River and the kitchen windows fog with the promise of dinner, there are few joys more comforting than the aroma of freshly baked pita rising in a Naperville home oven. I have baked this staple through humid July afternoons and under the watch of a January snowstorm, and I can tell you that authentic pita isn’t just a recipe—it’s a rhythm. The dough needs patience, the oven needs heat, and you, the baker, need the little local touches that make bread feel like it belongs here. Whether you are setting the table for a family meal in a classic Naperville bungalow or prepping for friends in a modern condo overlooking downtown, this guide will walk you through a truly authentic process. And if you ever need inspiration for what to tuck into those hot pockets, you can explore a deliciously relevant Mediterranean menu to spark your imagination.
Authentic pita has a personality. It’s simple yet nuanced, fast yet contemplative, rustic yet endlessly adaptable. When I learned to bake pita from an older neighbor who moved to Naperville decades ago, she focused less on exact measurements and more on how the dough should feel. That’s the secret that brings bakery-quality results into your home. In these paragraphs, I’ll give you the structure, but also the tactile cues: how sticky is right, how soft is soft enough, how warm your kitchen should be, and how long to wait before you slide each round into heat that’s as bright as our summer sun.
The Heart of Authentic Pita
At its core, pita is flour, water, yeast, salt, and time. The story of authenticity comes from how those elements meet. In Naperville kitchens, we benefit from consistent municipal water quality, moderate altitude, and strong home ovens. The environment is friendly to yeast, especially in spring and early fall when indoor temperatures hover around the sweet spot for fermentation. Authenticity is also about intention. Traditional pitas were made quickly to meet the flow of daily life, with the dough mixed in the morning and turned into lunch or dinner vessels soon after. That spirit translates well here, where many of us balance commutes, school pickups, and evening activities with the desire for a warm, fresh bread on the table.
Real pita is not flatbread pretending to be something else. It should puff into a balloon with a thin, shiny interior, then cool and settle into a pocket. That pocket is your canvas—ready for grilled chicken, garlicky dips, crunchy salads, or fragrant stews. But first, we craft the dough with care.
Ingredients and Their Roles
You can bake a fine pita with all-purpose flour, but for the most authentic structure—a tender chew with enough strength to hold fillings—I like a blend. Use about two-thirds bread flour for protein and one-third all-purpose for tenderness. If you’re shopping in Naperville, most grocery aisles carry dependable bread flour, and many local specialty stores stock unbleached varieties that perform beautifully. Yeast can be active dry or instant; both work. Salt should be fine-grain to disperse evenly. Water should be warm—not hot—hovering near the comfort of a long summer evening. A touch of olive oil can add suppleness, but authentic recipes often skip it, relying on hydration and technique to keep the crumb delicate.
I prefer the following ratio for a small household batch: about 60 to 65 percent hydration by weight. If you don’t weigh ingredients, imagine a dough that starts slightly sticky but quickly organizes as you knead. When you press your finger into it, the indent should slowly rebound. If working by feel, that rebound is a better guide than the clock.
Mixing and Kneading: Finding the Dough’s Rhythm
Start by dissolving yeast in warm water with a pinch of flour. Let it sit until it smells faintly sweet and bready—a subtle cue that fermentation has awakened. In a large bowl, whisk flour and salt. Add the yeasted water and mix with your hand until a shaggy mass forms. Cover and rest for ten minutes to allow the flour to hydrate, then knead. On a cool stone or a lightly floured wooden board, push away with the heel of your palm and fold back toward you. The dough will begin to smooth and tighten, and that’s what you want. After several minutes, test the windowpane: pinch off a small piece and stretch it. If it forms a thin translucent film before tearing, you’re ready.
In winter, when kitchens in Naperville can run cooler, you might extend kneading slightly or warm your bowl beforehand with a rinse of hot water. In summer, when kitchens can be warm and humidity high, mix gently and let time do more of the work. Cover the bowl and let the dough rise until doubled. The timing varies, usually about an hour, but trust the volume rather than the clock. The dough should feel aerated and softly springy when you press it.
Dividing and Resting
Turn the dough out, pat it into a gentle rectangle, and divide into eight equal pieces for classic pitas or six for large, sandwich-ready pockets. Shape each piece into a tight ball by tucking edges underneath and rotating against the counter to create surface tension. Set the balls on a lightly floured board, cover with a barely damp towel, and rest for twenty minutes. This relaxation stage is pivotal; it stops the dough from snapping back when rolled and promotes even puffing later. On busy days, this is when I prep toppings or warm a skillet. You’ll find your own rhythm, and it will soon feel like second nature.
Rolling for Puff
Authentic pita requires a balanced thickness. Too thin, and it crisps like a cracker; too thick, and the pocket struggles to form. Aim for a circle roughly six to seven inches across and about an eighth of an inch thick. Use a rolling pin with a light hand. Turn the dough a quarter turn after every pass to maintain a round shape. If the dough shrinks back, let it rest for a few minutes; that’s gluten asking for patience. Dust lightly as needed, but avoid heavy flouring, which can burn and leave a bitter taste.
Oven-Baked Pita in a Naperville Kitchen
Set your oven to its highest setting—usually 500 to 550°F—and preheat a baking stone or an inverted, heavy-duty sheet pan on the middle rack for at least 30 minutes. The heat must be fierce, like standing near a summer grill at Centennial Beach. Slide the rolled rounds onto the stone and watch through the oven window. In about two minutes, the dough should swell into a balloon. When this magic happens, you’ll feel the satisfaction that bakers across generations know well. Flip and bake another minute to set the bottom. If the color is pale, give it a bit longer; if spots char, don’t worry—that’s authentic character.
Electric ovens common in our area hold steady heat, while gas varieties recover temperature a touch faster. If your oven runs cool, bake one pita at a time to maximize the available heat. If you own a pizza steel, use it; the thermal mass helps achieve dramatic puffing. And if it’s a summer evening and you prefer not to heat the kitchen, consider using an outdoor grill with a cast-iron griddle; lid down to trap heat, pitas cook in a flash.
Stovetop Pita for a Hands-On Approach
Another authentic method uses a cast-iron skillet or griddle preheated over medium-high. Brush off excess flour from each round, lay it gently on the hot surface, and wait for bubbles to appear. Flip once, then again, encouraging the balloon to form. If you press lightly with a clean towel as it inflates, you can guide even puffing. The stovetop version creates lovely brown freckles and keeps the kitchen nimble, especially if you’re baking a small batch for dinner.
The Science Behind the Pocket
The pocket isn’t a mystery. It’s steam. As heat hits the moistened dough, the outer layer sets while the inner moisture flashes to steam, pushing the layers apart. Proper rolling ensures consistent thickness, while a hot surface seals the outer shell at just the right moment. If your dough is under-proofed, it may be too tight to separate. If it’s over-proofed, it might collapse before the pocket sets. Authenticity lives right in that balance, and after a batch or two, you’ll feel it coming together like second nature.
Troubleshooting Common Issues
If pitas don’t puff, check your heat first. Often the oven or skillet wasn’t hot enough. Then consider dough thickness; a slightly thicker round may hold more steam. Check fermentation; if the dough smells flat or feels dense, give the yeast more time or verify that it’s active. If the bottoms burn while the tops remain pale, move your rack up one level or layer parchment under the dough for insulation. Don’t be discouraged by a few flat pitas; they make excellent chips or dippers, and the next batch usually rises to the occasion.
Flavor Variations That Respect Tradition
Authentic pita rewards restraint, but thoughtful additions can complement our local produce. A teaspoon of honey brings gentle sweetness that pairs beautifully with summer tomatoes from Naperville’s farmers market. A splash of olive oil softens the crumb, ideal for stuffing with shredded chicken. You can fold in a handful of finely chopped fresh herbs—parsley or dill—without compromising puff. If you prefer whole wheat, start with a blend: half bread flour, half whole wheat. Increase hydration to keep the dough supple, and allow a slightly longer rest so the bran softens and the pocket formation remains reliable.
Serving Pita the Naperville Way
Fresh pita begs for vibrant fillings that match our region’s seasonal rhythm. In spring, fill pockets with lemony grilled asparagus, sliced radishes, and a swipe of yogurt. Summer calls for charred peppers, cucumber salads, and juicy grilled chicken or tofu. When fall cools the air, roasted squash with tahini and pickled onions brings comforting sweetness, and in winter, braised meats or lentils tucked with greens make a hearty, warming meal. For inspiration on how to pair pita with bold, savory flavors, browse a well-curated shawarma menu and imagine the combinations you’ll bring to your own table.
Make-Ahead and Storage
Authentic pita fits into a busy Naperville week when you plan ahead. After the first rise, you can refrigerate dough balls for up to a day; they’ll chill slowly, developing deeper flavor. Let them come back toward room temperature before rolling. Baked pitas keep well in an airtight bag at room temperature for a day or two. To refresh, wrap in a slightly damp towel and warm in a low oven just until soft. For longer storage, freeze in stacks separated by parchment. Reheat from frozen on a hot skillet, and they’ll taste nearly as good as fresh.
Entertaining with Pita
When friends come by after a stroll through downtown, I like to line the counter with warm pitas and a spread of spreads: silky hummus, garlicky yogurt, bright herb sauces, and pickled vegetables. Everyone builds their own combinations, and the table turns lively in an instant. Authentic pita excels at these gatherings because it feels welcoming—no knife-and-fork rules, just good food and conversation. If you’re hosting a big crowd, bake ahead and reheat, or roll and cook in real time. The small performance of watching each bread puff never fails to delight.
Cooking with Kids
Rolling dough is a perfect task for kids. Show them how to flour the pin lightly, roll from the center, and nudge the circle into shape. They’ll love seeing the puff happen, and that moment becomes a secret they feel they’ve learned about the world. Pita night can be a tradition that sticks—something they associate with home, warmth, and the pleasure of making food with their own hands.
Authenticity Through Practice
No recipe can replace the lessons you’ll learn from your own kitchen. An authentic pita in Naperville is your pita, formed by your hands, your oven, your timing. Take notes: how long the rise took in your house today, how hot the oven felt, how quickly the first pita puffed. With repetition, your moves become confident, and the bread rewards you every time. You start to sense the perfect moment to roll, the best rack position, the ideal skillet heat. That intuition is the taste of authenticity.
Frequently Asked Questions
Why didn’t my pita puff?
Usually the baking surface wasn’t hot enough, or the dough was rolled too thin or too thick. Aim for a strong preheat of at least 30 minutes and a thickness around one-eighth of an inch. Also, ensure the dough rose adequately; under-proofed dough resists steam separation, while over-proofed dough can collapse.
Can I use whole wheat flour for authentic results?
Yes. Start with a 50-50 mix of bread flour and whole wheat. Increase hydration slightly and give the dough a longer rest before rolling so the bran softens. You’ll still get tender pockets with a pleasant, nutty depth.
Is a baking stone necessary?
Not strictly, but it helps. An inverted heavy sheet pan, preheated thoroughly, can yield excellent results. A pizza steel is even better for dramatic puffing. For stovetop pitas, a cast-iron skillet works beautifully.
How warm should my kitchen be for proofing?
Yeast is comfortable around 75°F. In winter, warm the bowl, or let the dough rise in the oven with just the light on. In summer, watch closely and shorten rise times to prevent over-proofing.
Can I make the dough in advance?
Absolutely. Refrigerate the dough balls after the first rise for up to 24 hours. Let them warm toward room temperature before rolling to encourage proper puffing.
What is the best way to store baked pitas?
Cool completely, seal in an airtight bag, and keep at room temperature for a day or two. For longer storage, freeze with parchment between layers. Reheat on a hot skillet or in a moderate oven wrapped in a damp towel.
Can I grill pita outdoors?
Yes. Preheat a griddle or pizza stone on the grill, lid closed to trap heat. The intense bottom heat and enclosed environment mimic a hot oven and encourage puffing. Watch closely to avoid scorching.
Is oil necessary in authentic pita dough?
Traditional recipes often skip oil. With adequate hydration and proper kneading, the crumb will be soft and pliable. A small splash of olive oil is optional and can add tenderness, but it’s not required for authenticity.
Final Thoughts for Naperville Bakers
There’s a moment when the first pita inflates, and you feel connected to cooks across time and place. Bring that feeling into your week. Invite family to gather, stack the breads in a towel-lined basket, and let the table fill with color and warmth. If you’d like ideas for bold, savory fillings that turn a warm pocket into a full meal, take a look at this inviting menu and start planning your next pita night. Your kitchen is ready; the dough just needs your hands.